API login and JWT token generation using Keycloak
Set up a user
- First, we will create a simple user in Keycloak, as shown in Figure 1. And fill in all mandatory fields, such as Username, First Name, and Last Name,
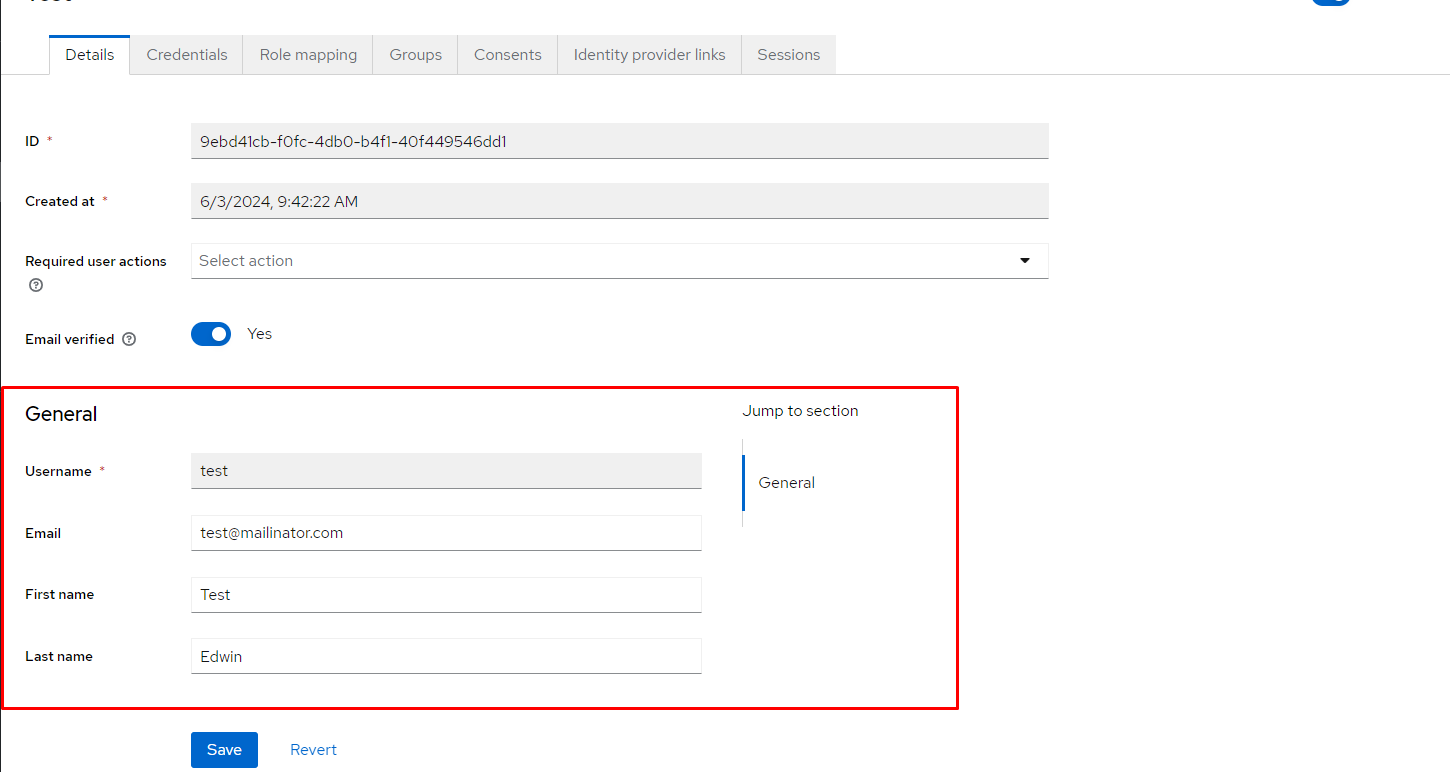
Figure 1: Create a user in Keycloak.”>
- Set the user’s password, as shown in Figure 3.
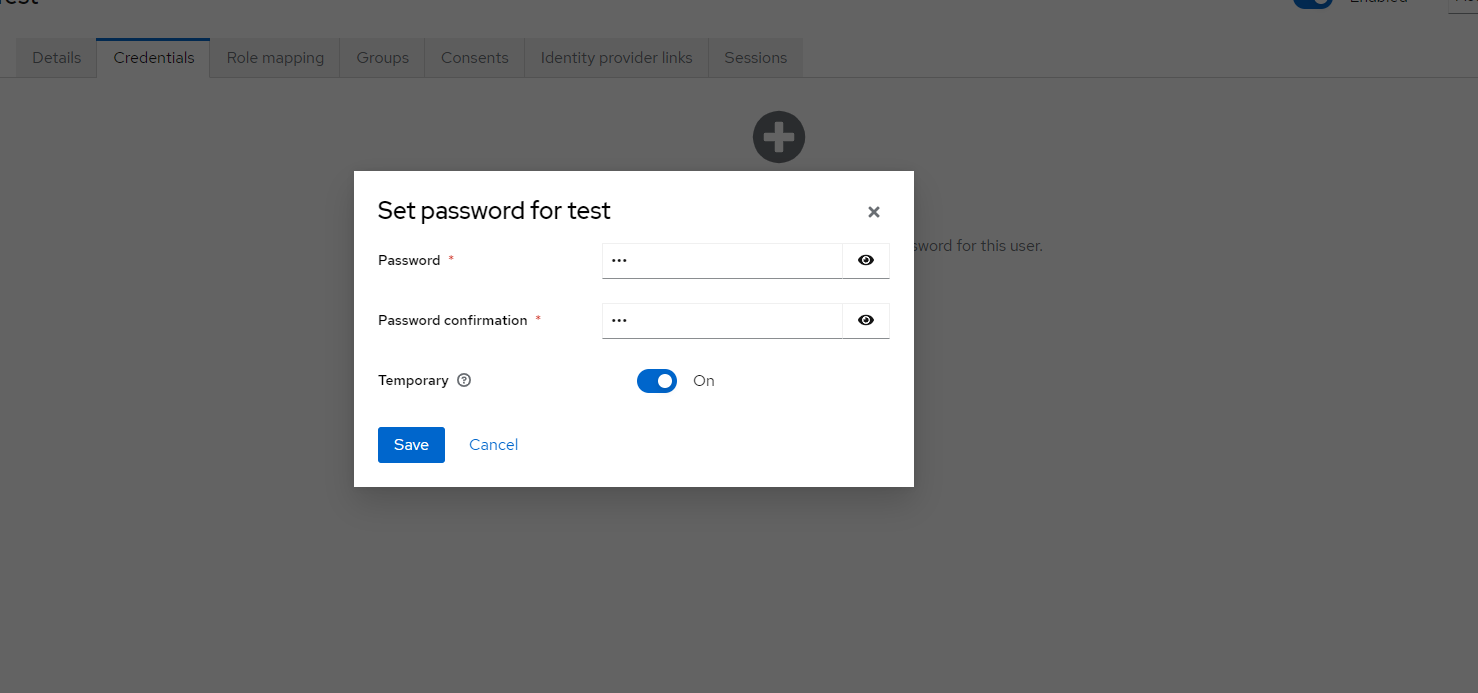
Figure 3: Set the user’s password.”>
Set up a client
The next step is to create a specific client in our realm, as shown in Figure 4. A client in Keycloak represents a resource that particular users can access, whether for authenticating a user, requesting identity information, or validating an access token.
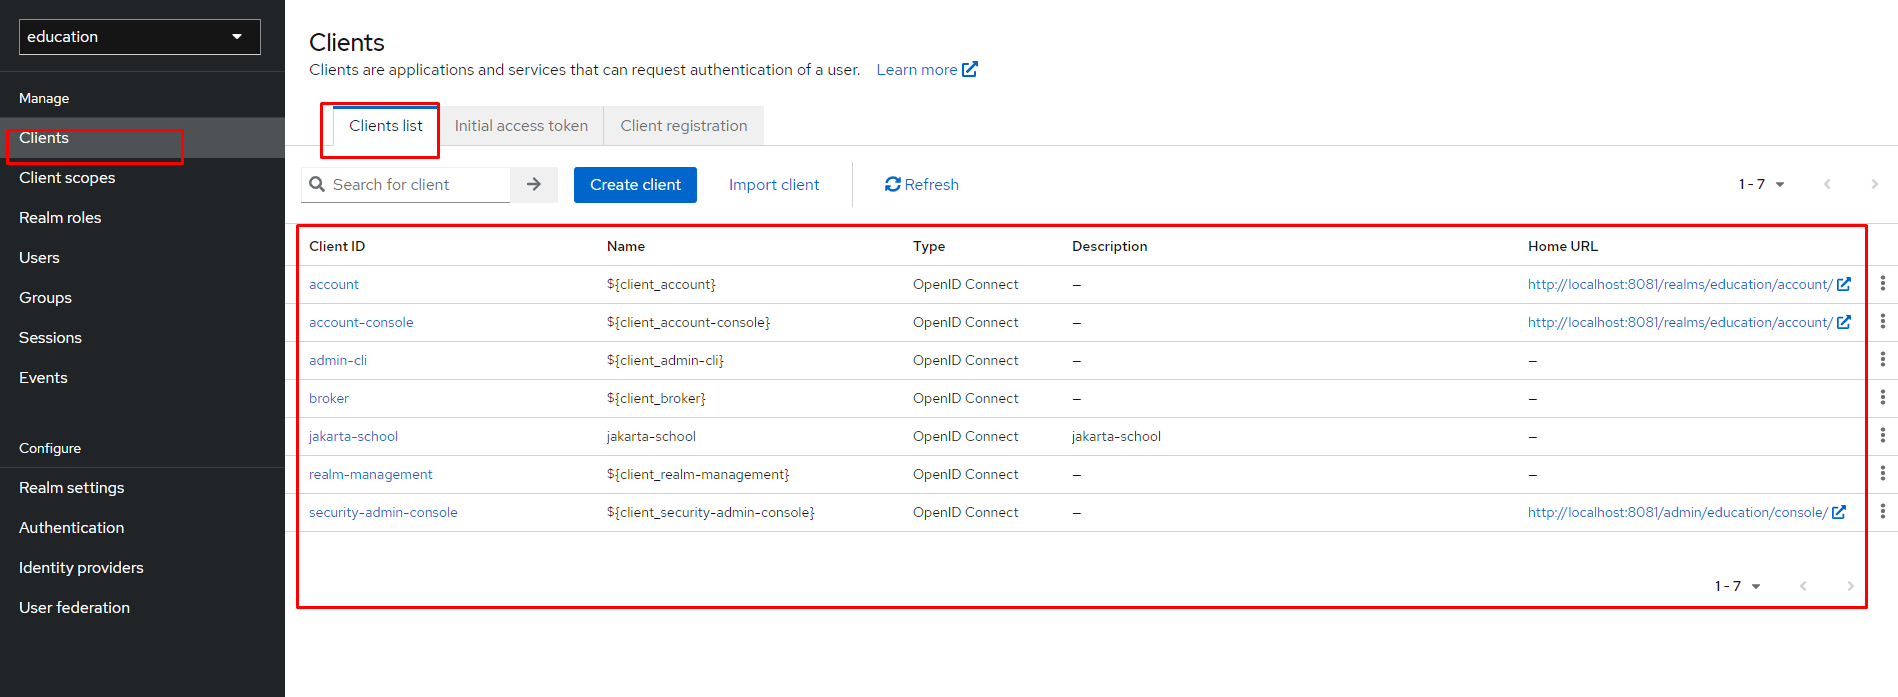
Figure 4: View your existing clients.”>
- Click Create to open the Add Client dialog box, as shown in Figure 5.
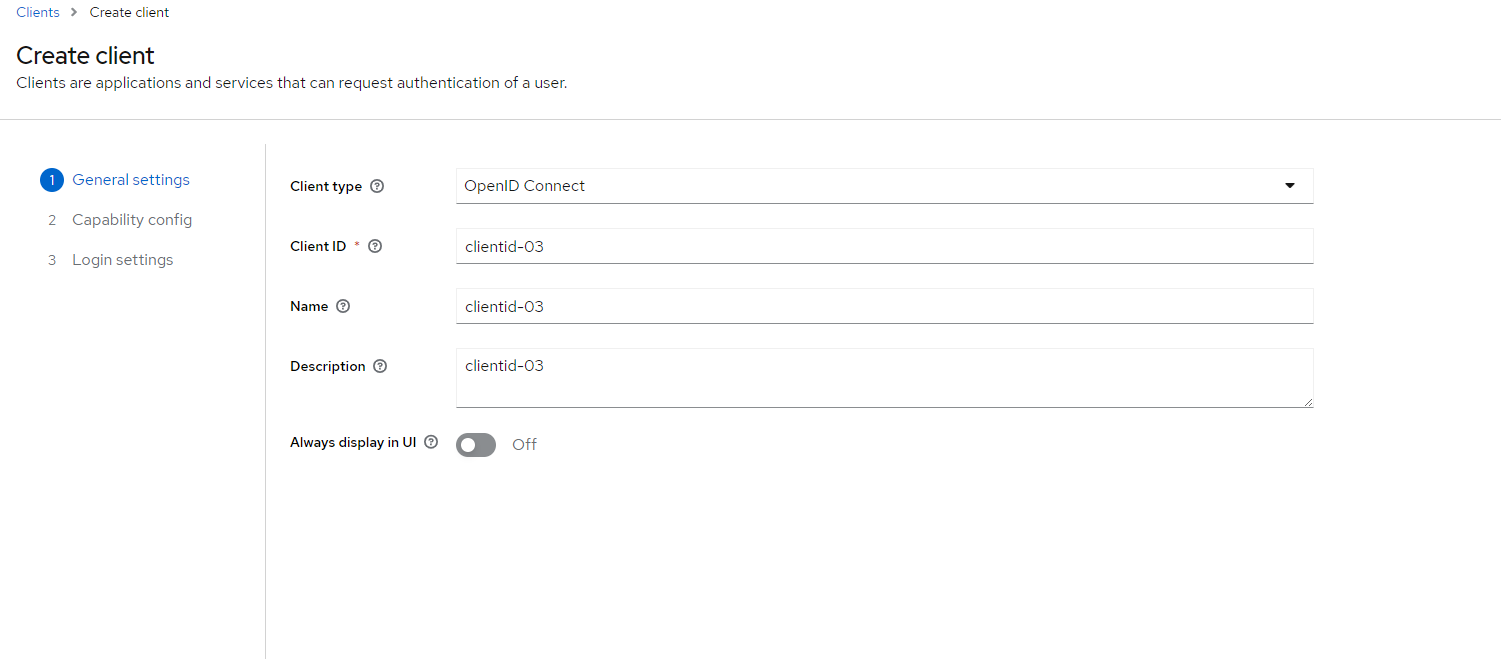
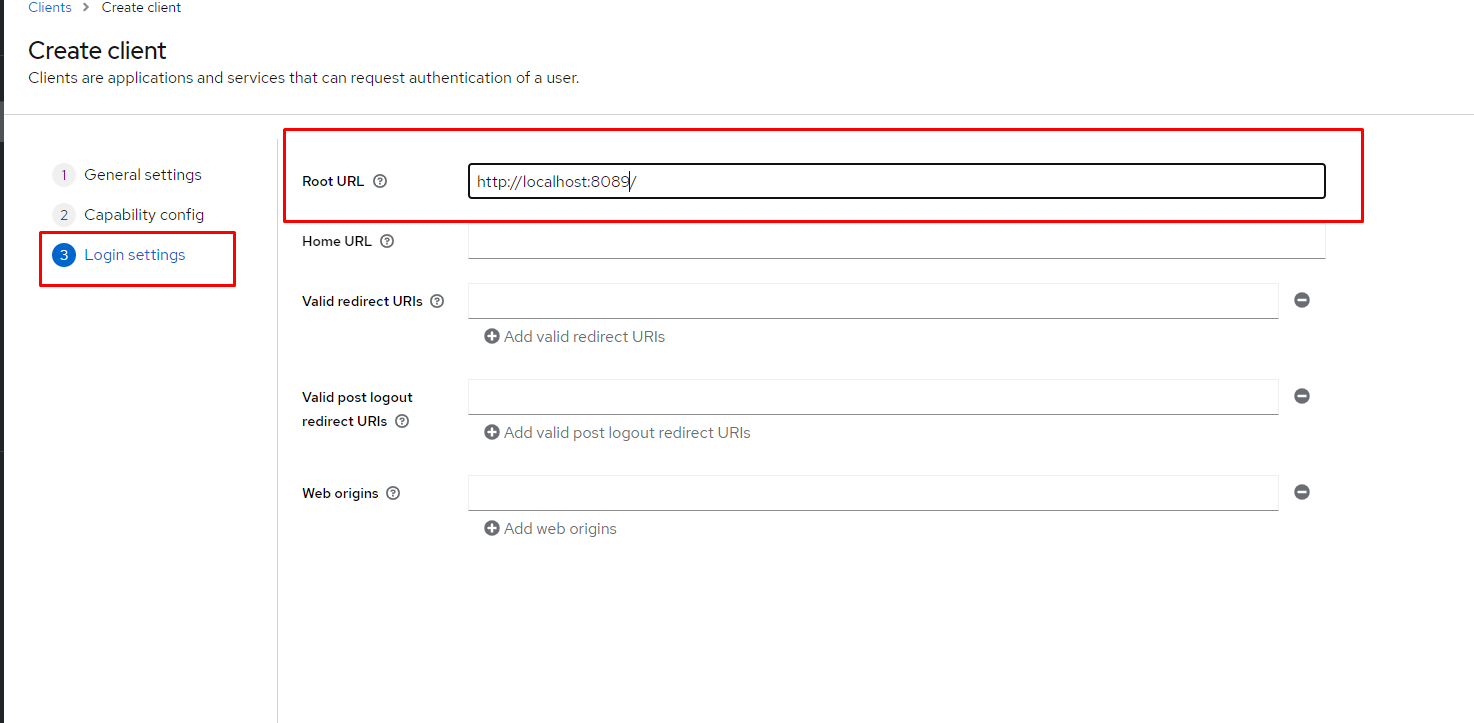
Figure 5: Create a new client.”>
- Fill in all of the mandatory fields in the client form. Pay attention, especially, to Direct Grant Flow (shown in Figure 6) and set its value to direct grant. Also, change Access Type to confidential.
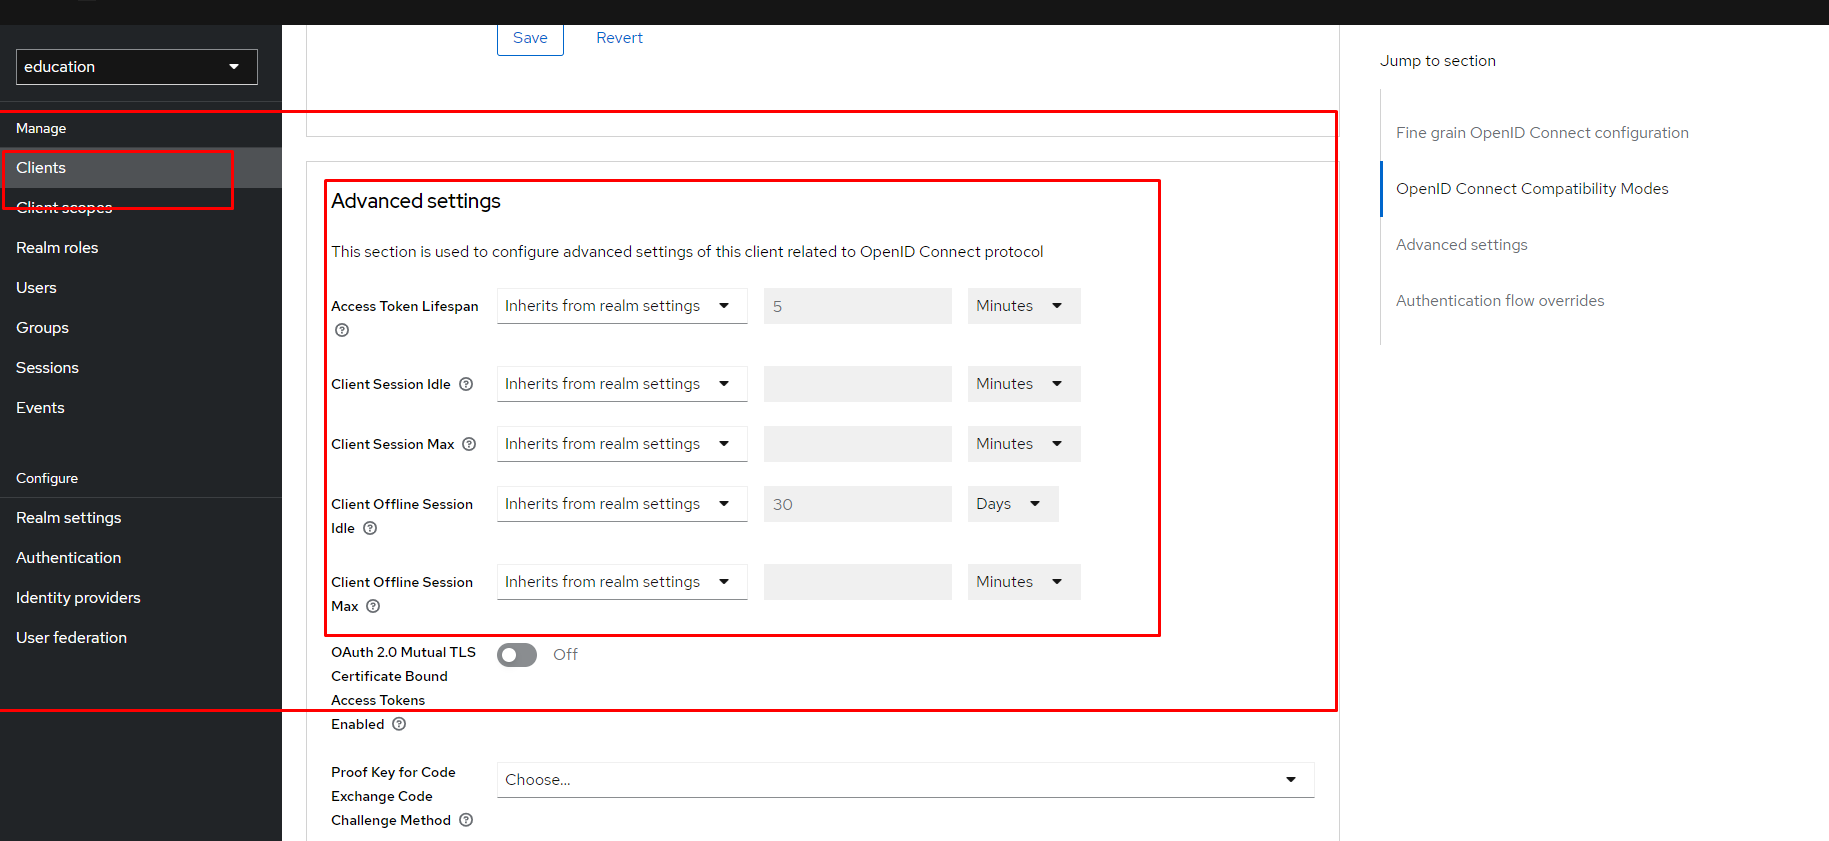
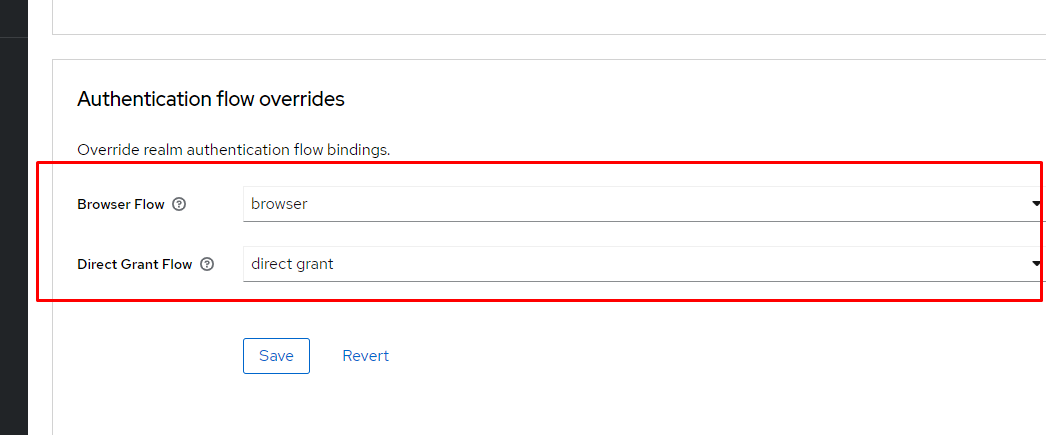
Figure 6: Overriding the client’s authentication flow.”>
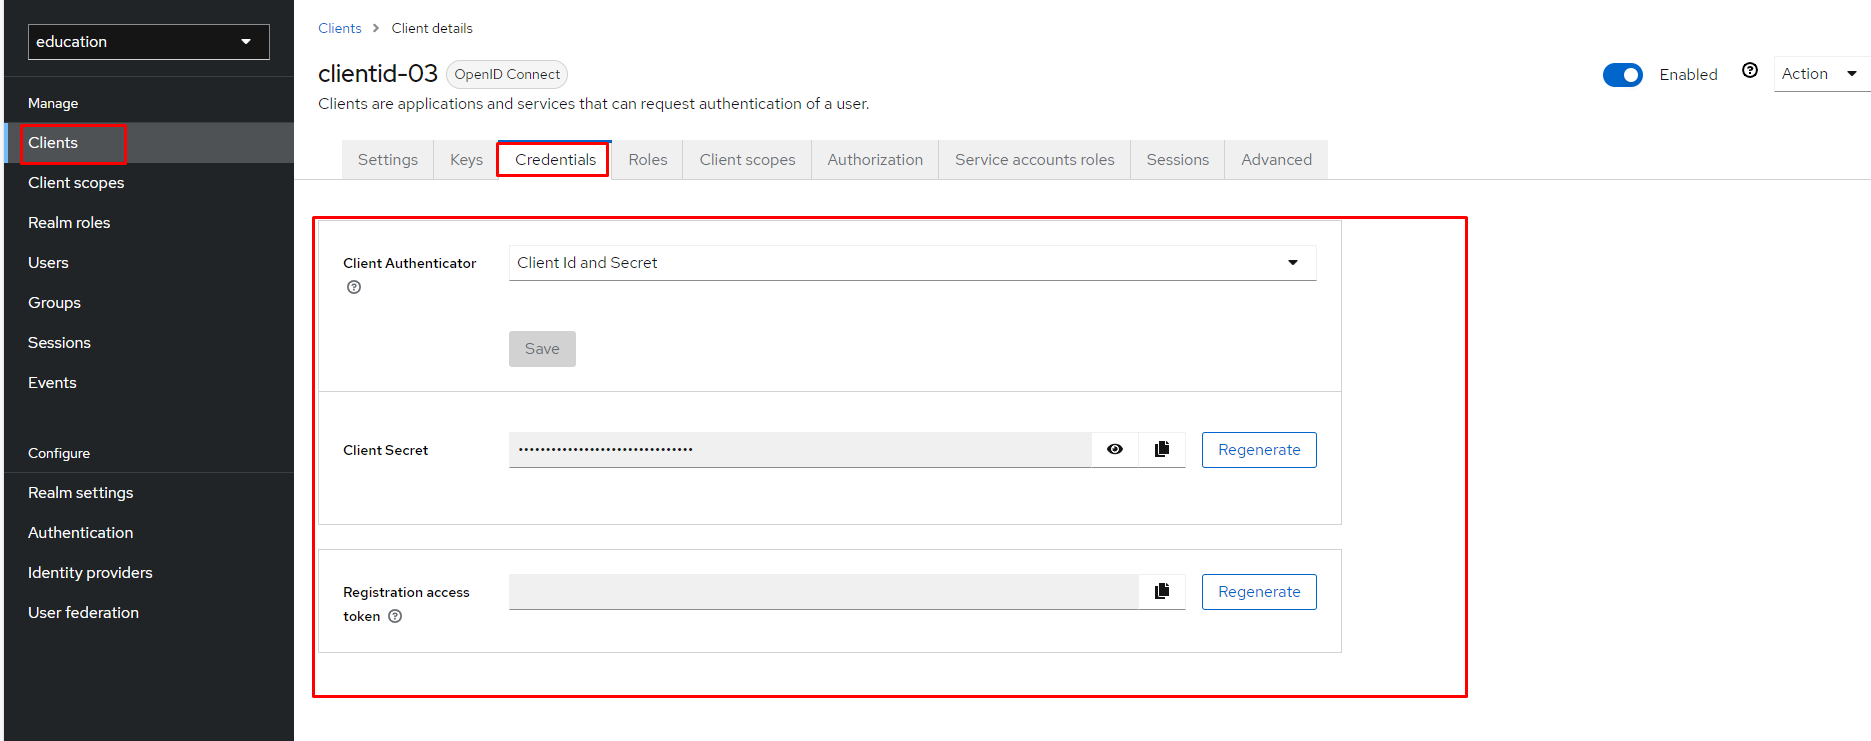
- Finally, change the client’s credentials in the Client Authenticator field to Client Id and Secret, as shown in Figure 7.
Test your new client
- Note: turn off update-password
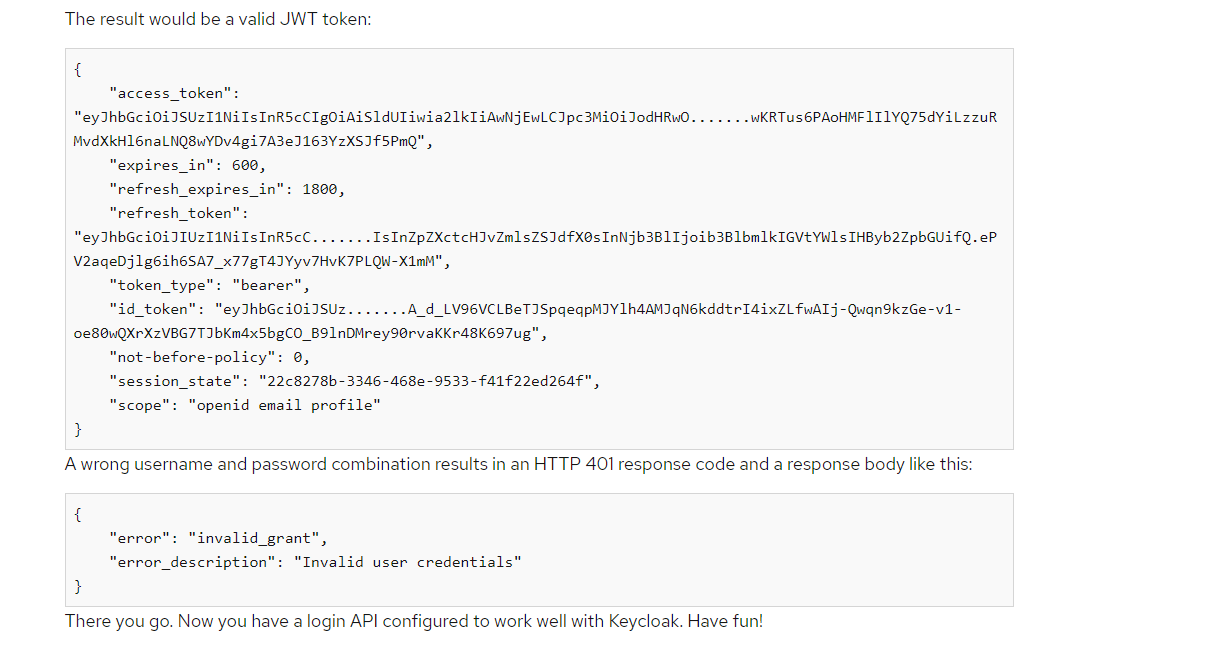
Now we can test our newly created client through the REST API to simulate a simple login. Our authentication URL is:
curl --location 'http://localhost:8081/realms/education/protocol/openid-connect/token' \
--header 'Content-Type: application/x-www-form-urlencoded' \
--data-urlencode 'client_id=clientid-03' \
--data-urlencode 'grant_type=password' \
--data-urlencode 'client_secret=lhCaNSRCYF1dOMo9goNyAIZPZsBOrVz1' \
--data-urlencode 'scope=openid' \
--data-urlencode 'username=test' \
--data-urlencode 'password=123'
Written on June 3, 2024