OAuth using KeyCloak REST API
Authentication versus authorization
link: https://developers.redhat.com/blog/authentication-and-authorization-using-the-keycloak-rest-api#keycloak_sso_demo
Sự khác biệt giữa xác thực và ủy quyền là gì? Nói một cách đơn giản, xác thực có nghĩa là bạn là ai, trong khi ủy quyền có nghĩa là bạn có thể làm gì, với mỗi cách tiếp cận sử dụng các phương pháp riêng biệt để xác nhận.
-
Ví dụ: xác thực sử dụng biểu mẫu đăng nhập và quản lý người dùng và ủy quyền sử dụng kiểm soát truy cập dựa trên vai trò (RBAC) hoặc danh sách kiểm soát truy cập (ACL).
-
May mắn thay, các phương thức xác thực này được cung cấp trong các công cụ đăng nhập một lần (SSO) của Red Hat hoặc trong dự án mã nguồn mở ngược dòng của họ, API REST của Keycloak.
### Nghiên cứu điển hình về Keycloak SSO
Để hiểu rõ hơn về việc sử dụng Keycloak để xác thực và ủy quyền, hãy bắt đầu với một case study đơn giản,
-
Giả sử rằng Bộ Giáo dục Indonesia đang có kế hoạch tạo ra một tích hợp đăng nhập một lần với nhiều trường học.
-
Họ có kế hoạch duy trì ID tài khoản duy nhất của học sinh và giáo viên trên nhiều trường bằng cách sử dụng một nền tảng tập trung.
-
Điều này cho phép mỗi người dùng có cùng vai trò, nhưng với quyền truy cập và đặc quyền khác nhau ở mỗi trường, như thể hiện trong Hình.
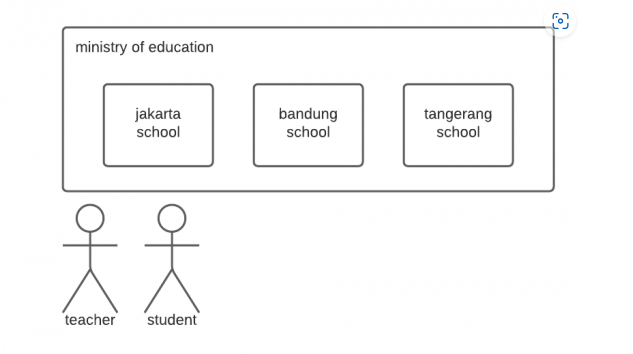
Mỗi người dùng có thể sử dụng cùng một vai trò, nhưng với quyền truy cập và đặc quyền khác nhau ở mỗi trường. >
Bản demo Keycloak SSO
- Let’s start the demo by creating a Keycloak realm. Using the Add realm dialog box for this ministry (as shown in Figure 2). Name the realm education, set Enabled to ON, and click Create.
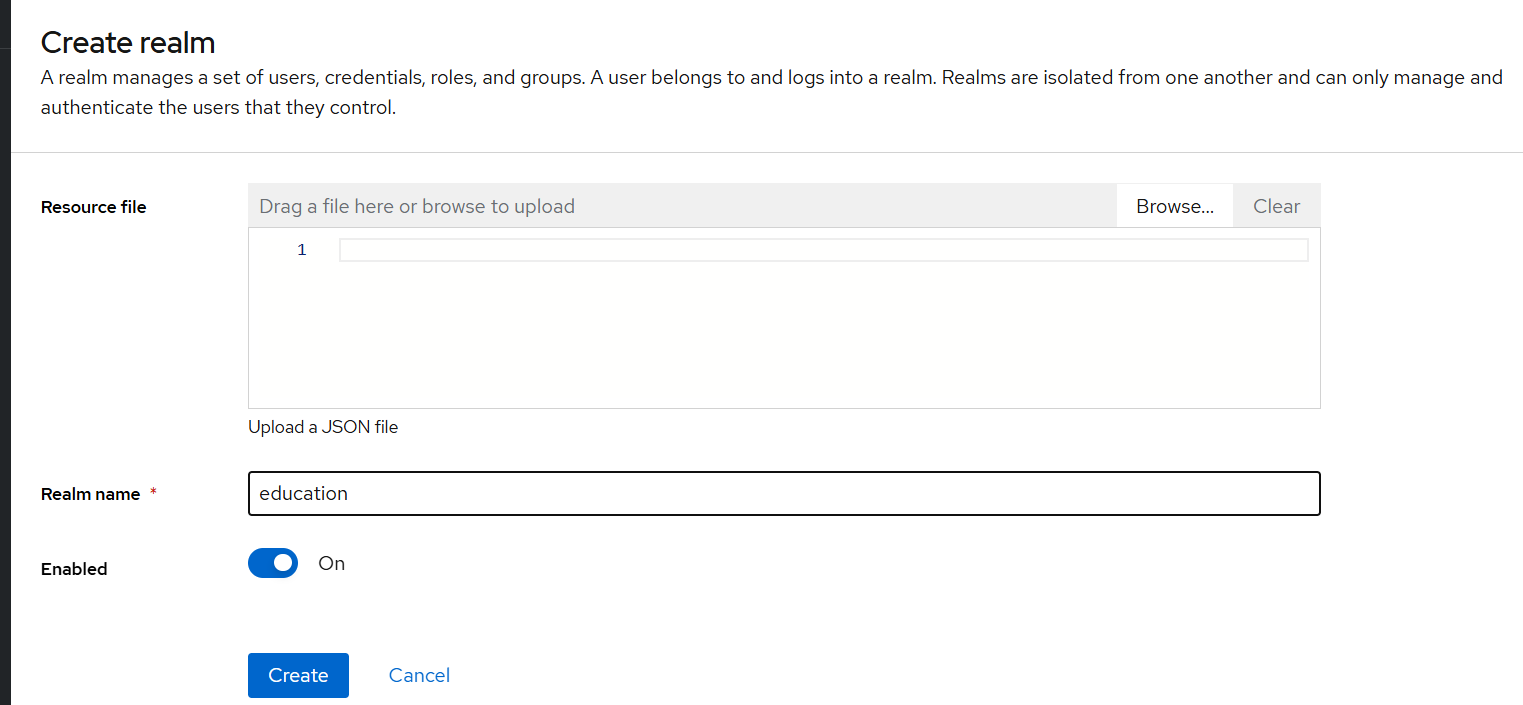
Figure 2 : Create a Keycloak realm for the Ministry of Education named “education.”
- Next, go to the Roles page and make sure the Realm Roles tab is selected, as shown in Figure 3.

Figure 3: Create two separate roles for the education realm: teacher and student.
- Click Add Role to create two separate roles for this realm called “teacher” and “student.” These new roles will then appear in the Realm Roles tab as shown in Figure 4.

Figure 4: Add the teacher and student roles.
- Then, using the Clients page, click Create to add a client, as shown in Figure 5.
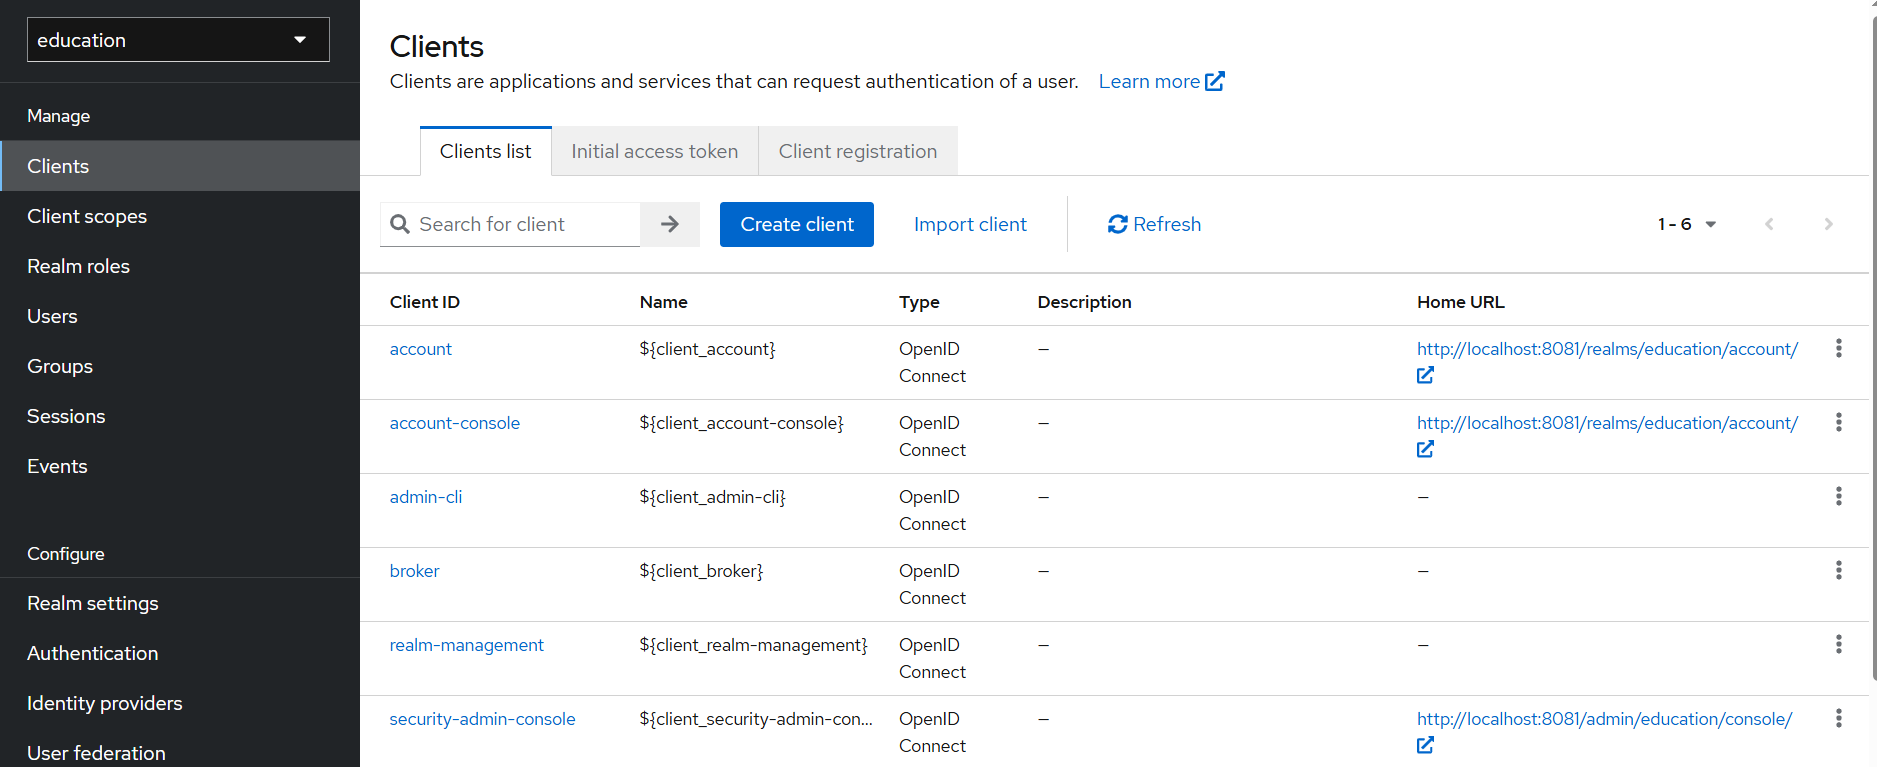
Figure 5: Add a client
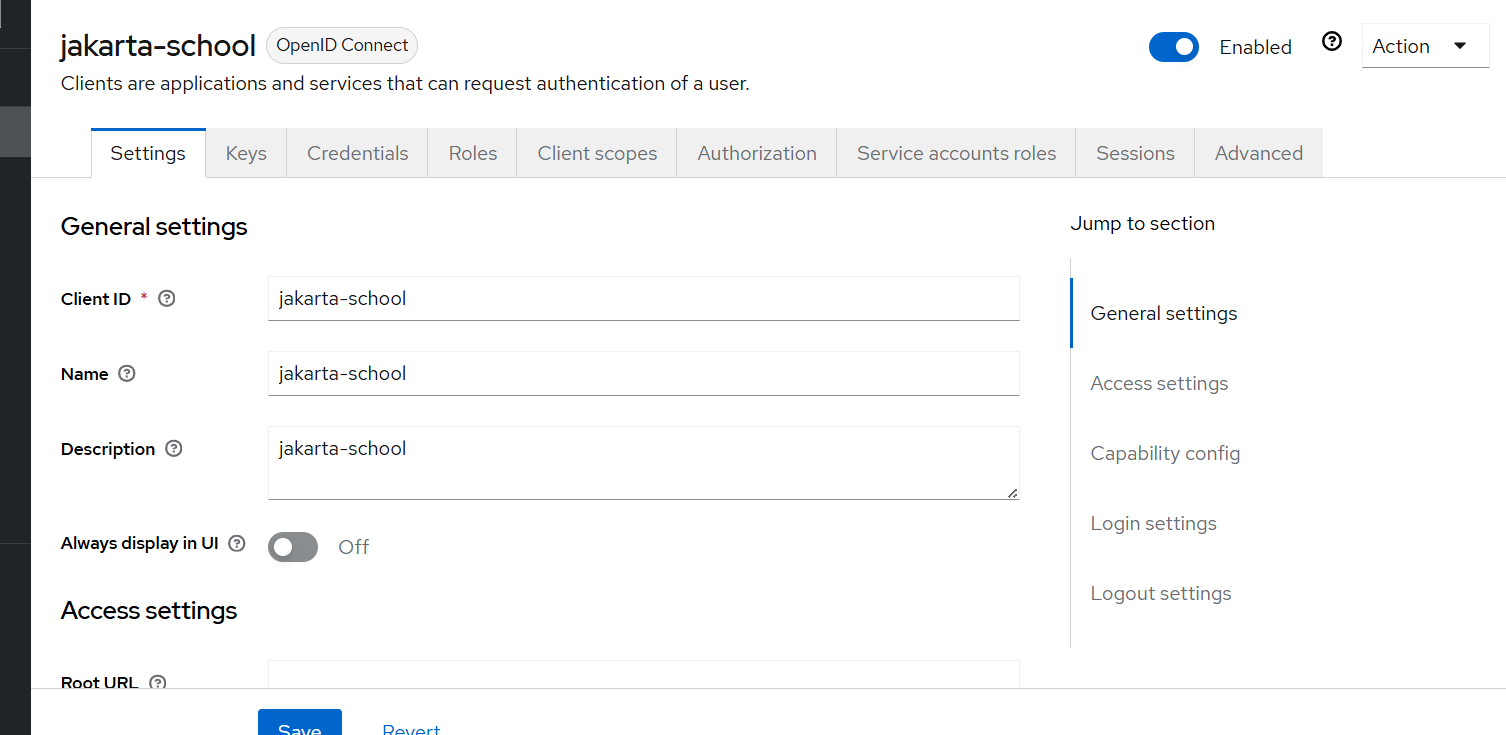
- On the Add Client page, create a client named jakarta-school, and click Save to add this client, as shown in Figure 6.
- At the bottom of the same page, on the Authentication Flow Overrides part, we can set to the following as shown in Figure 8:
- Browser Flow: browser
- Direct Grant Flow: direct grant
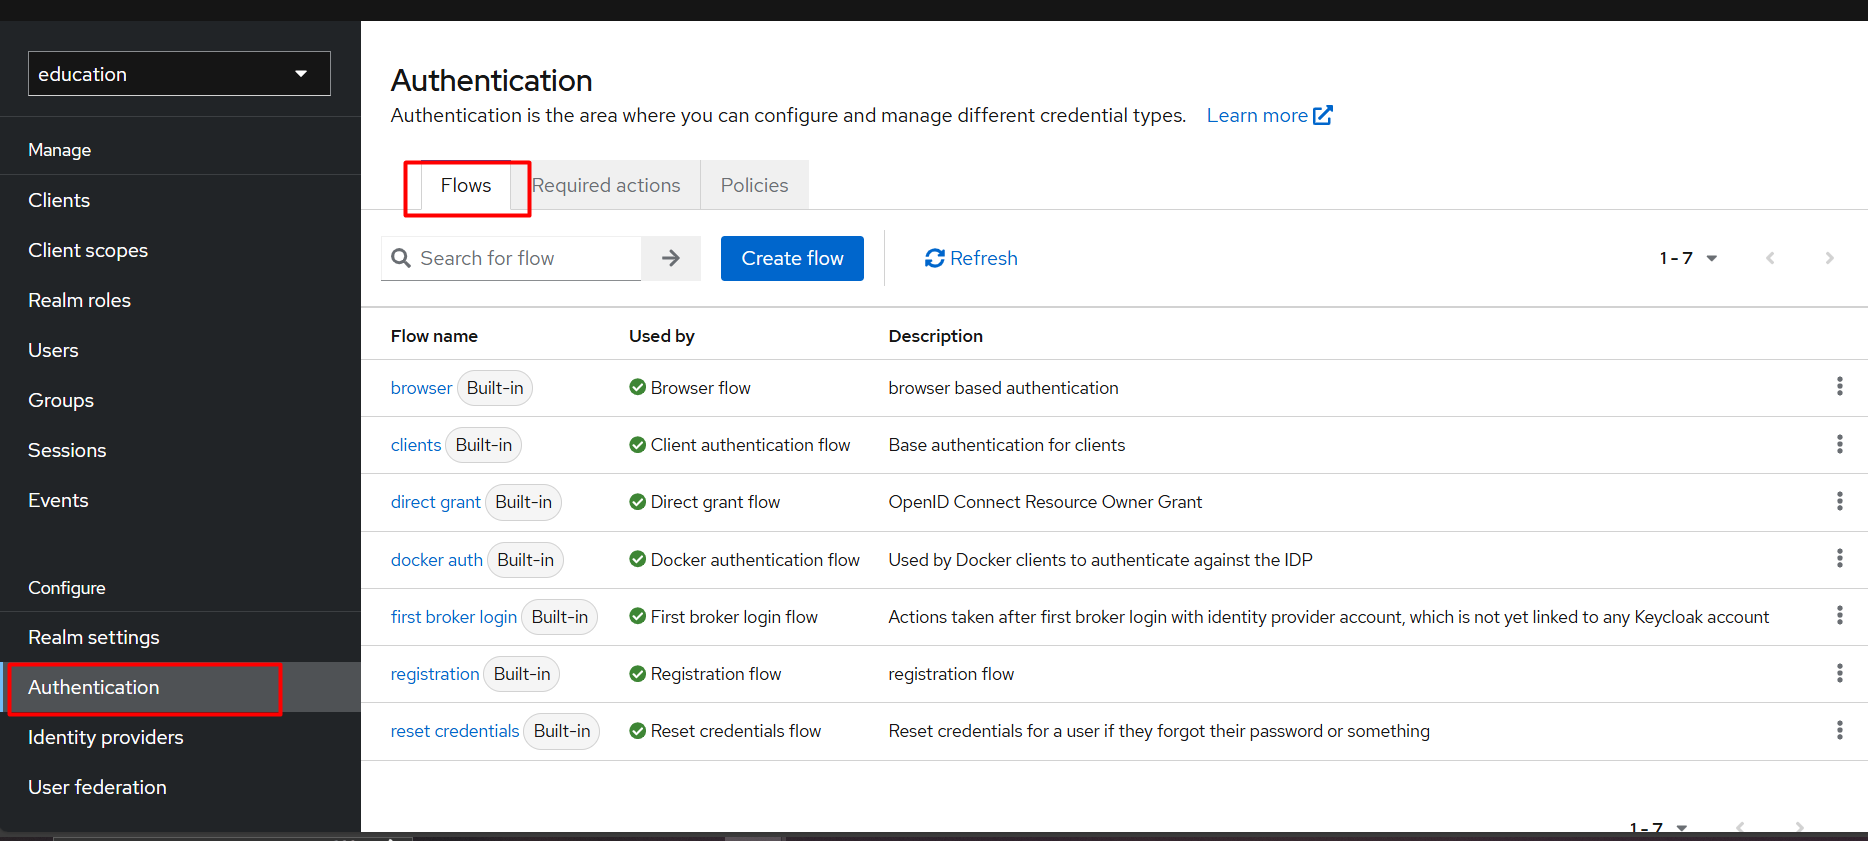
Figure 8: Configure the authentication flow overrides.
- Go to the Roles tab, click Add Role, and create the create-student-grade, view-student-grade, and view-student-profile roles for this client as shown in Figure 9. Each should be set to Composite False
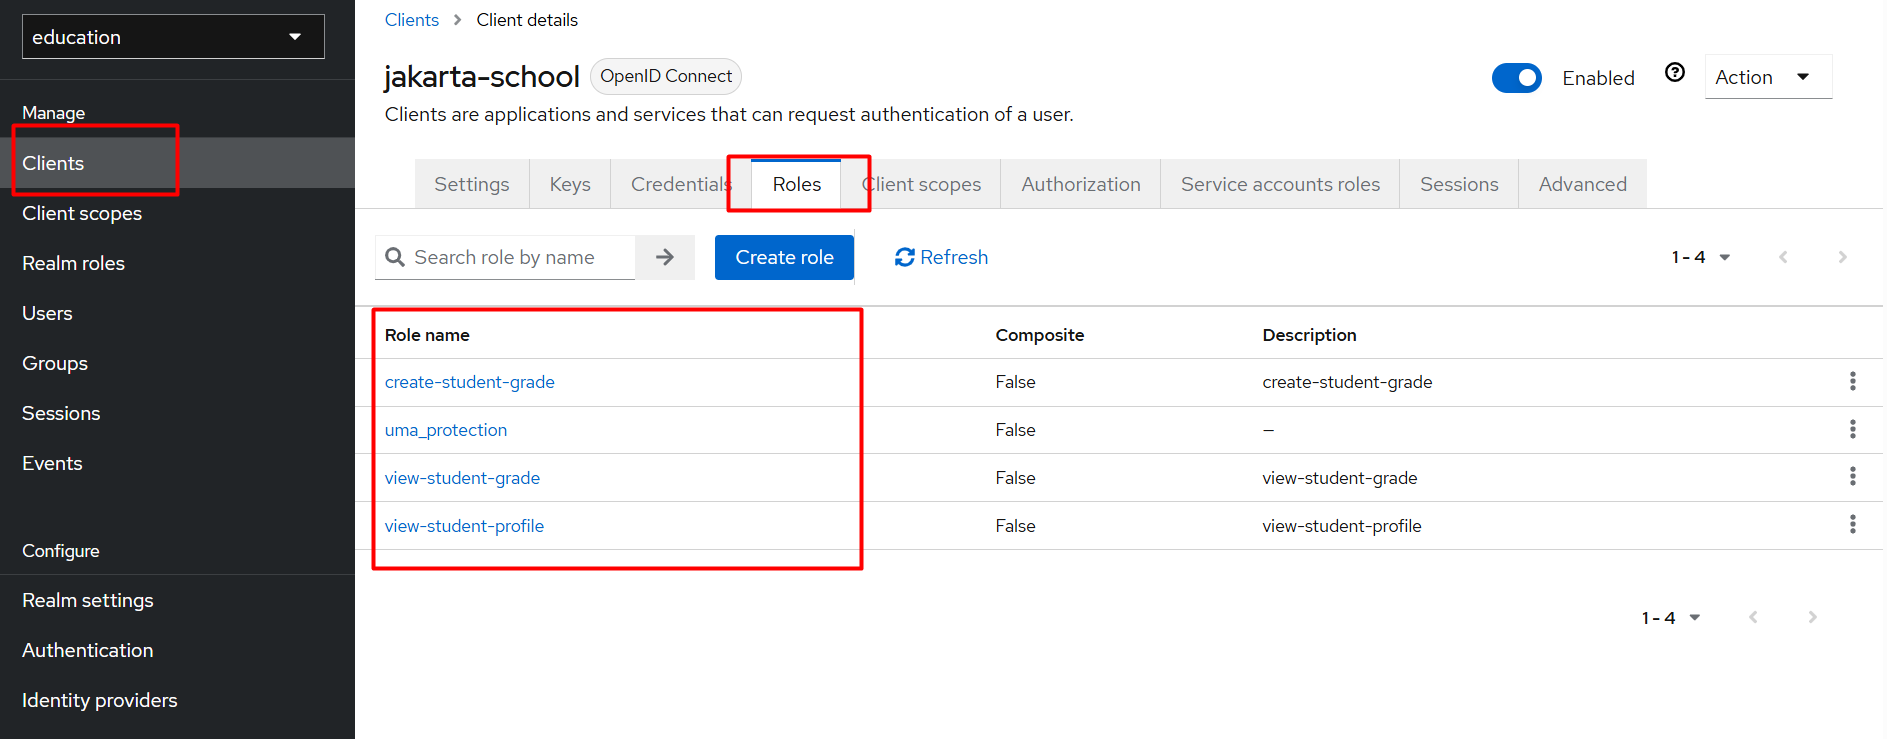
Figure 9: Create roles for this client
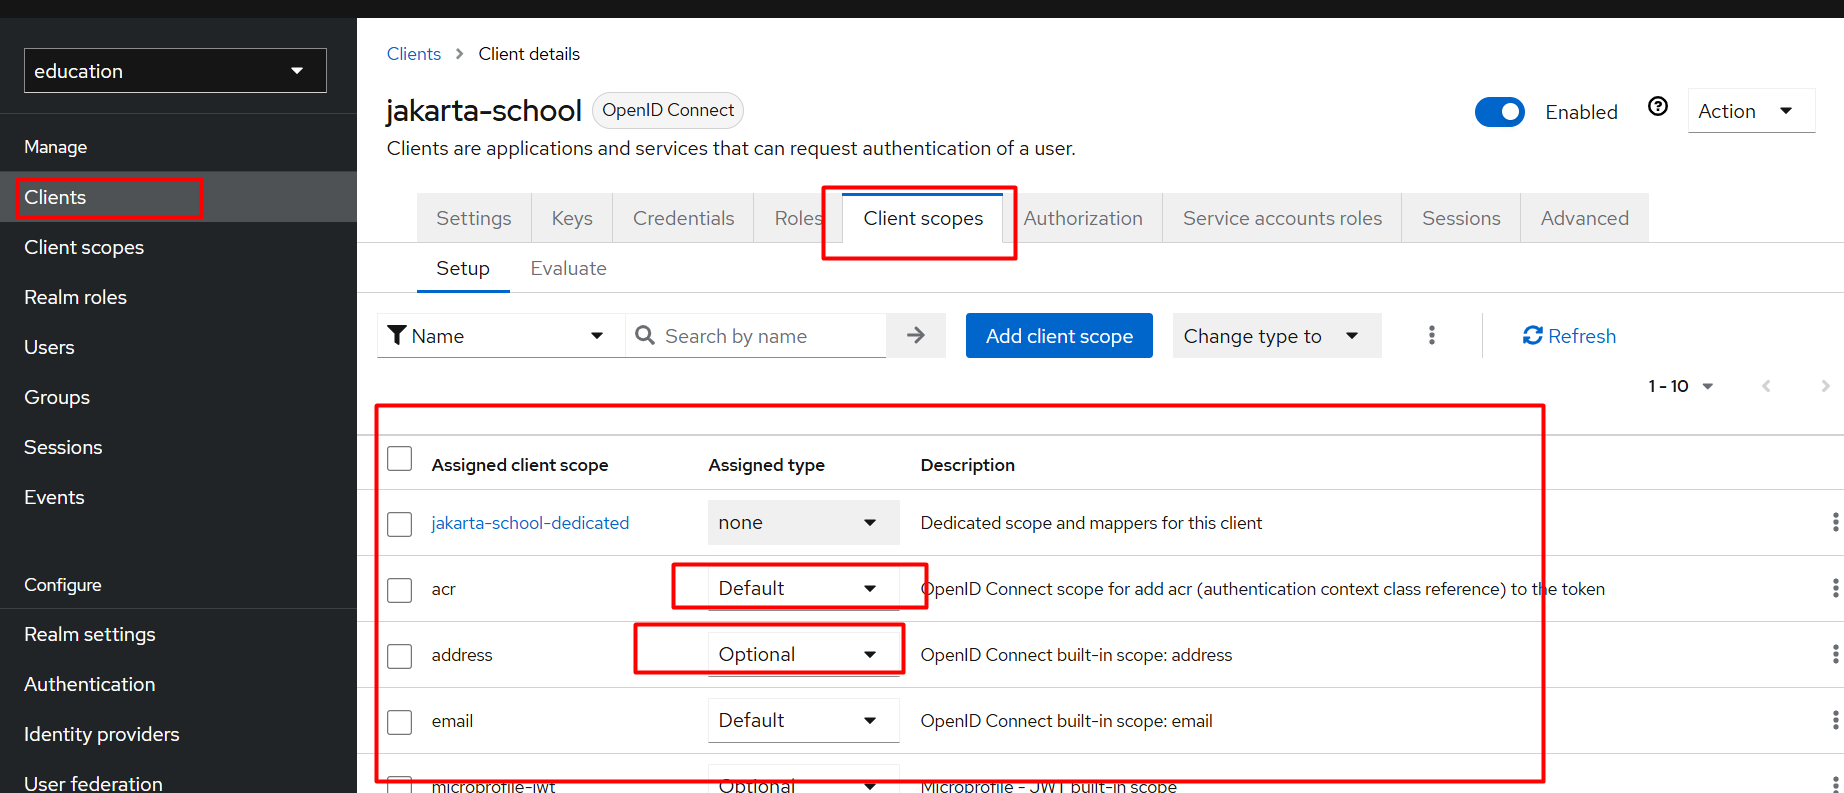
- Next, go to the Client Scopes tab and in the Default Client Scopes section, add “roles” and “profile” to the Assigned Default Client Scopes, as shown in Figure 10.
- On the jakarta-school details page, select Mappers and then Create Protocol Mappers, and set mappers to display the client roles on the Userinfo API, as shown in Figure 11:
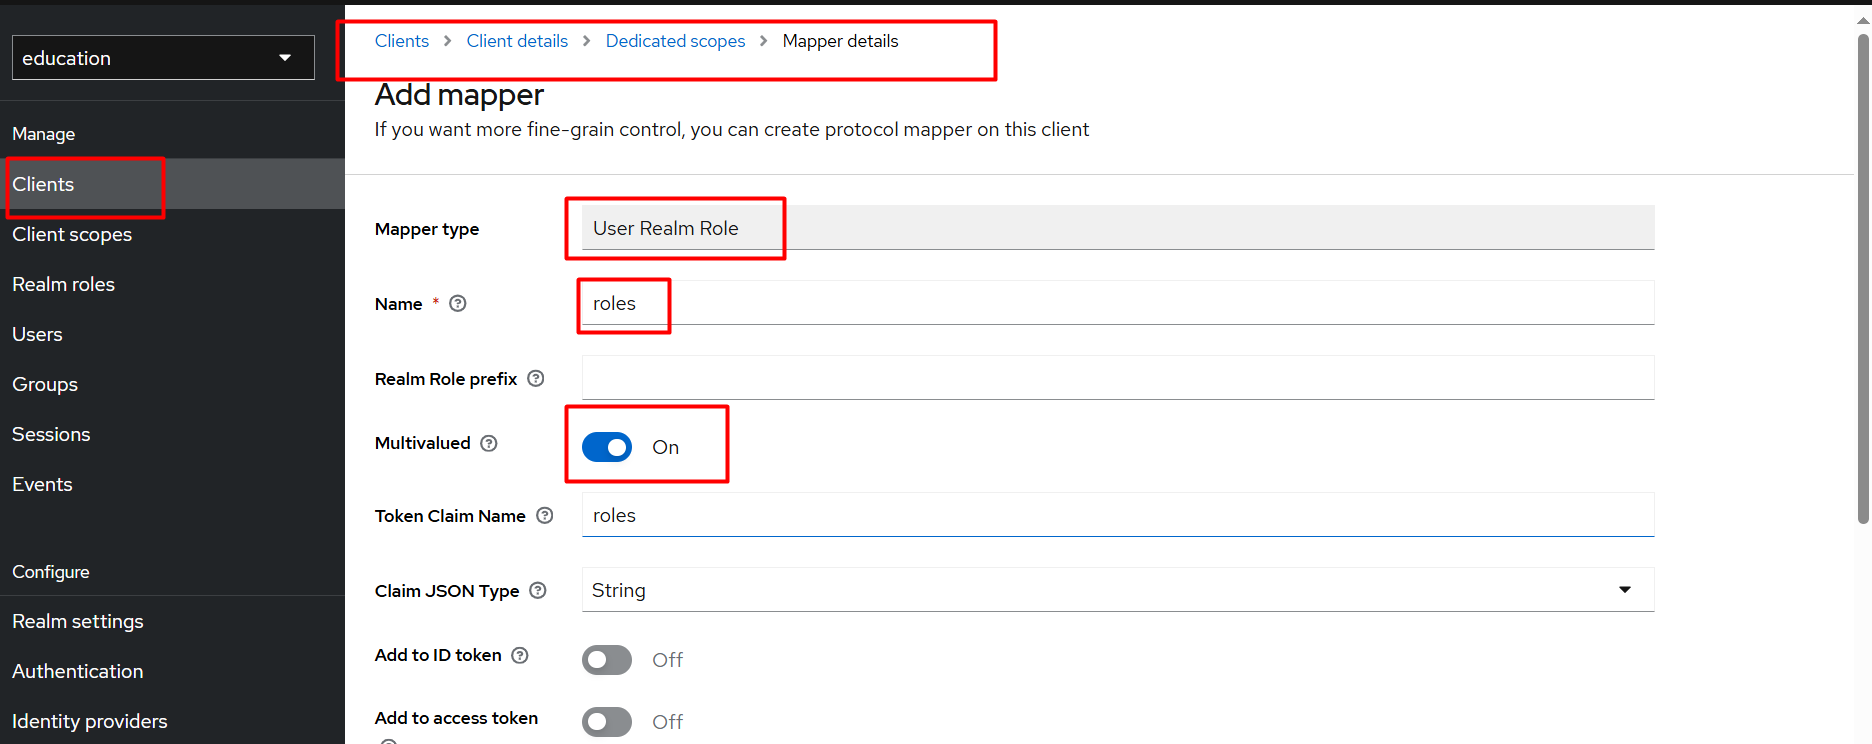
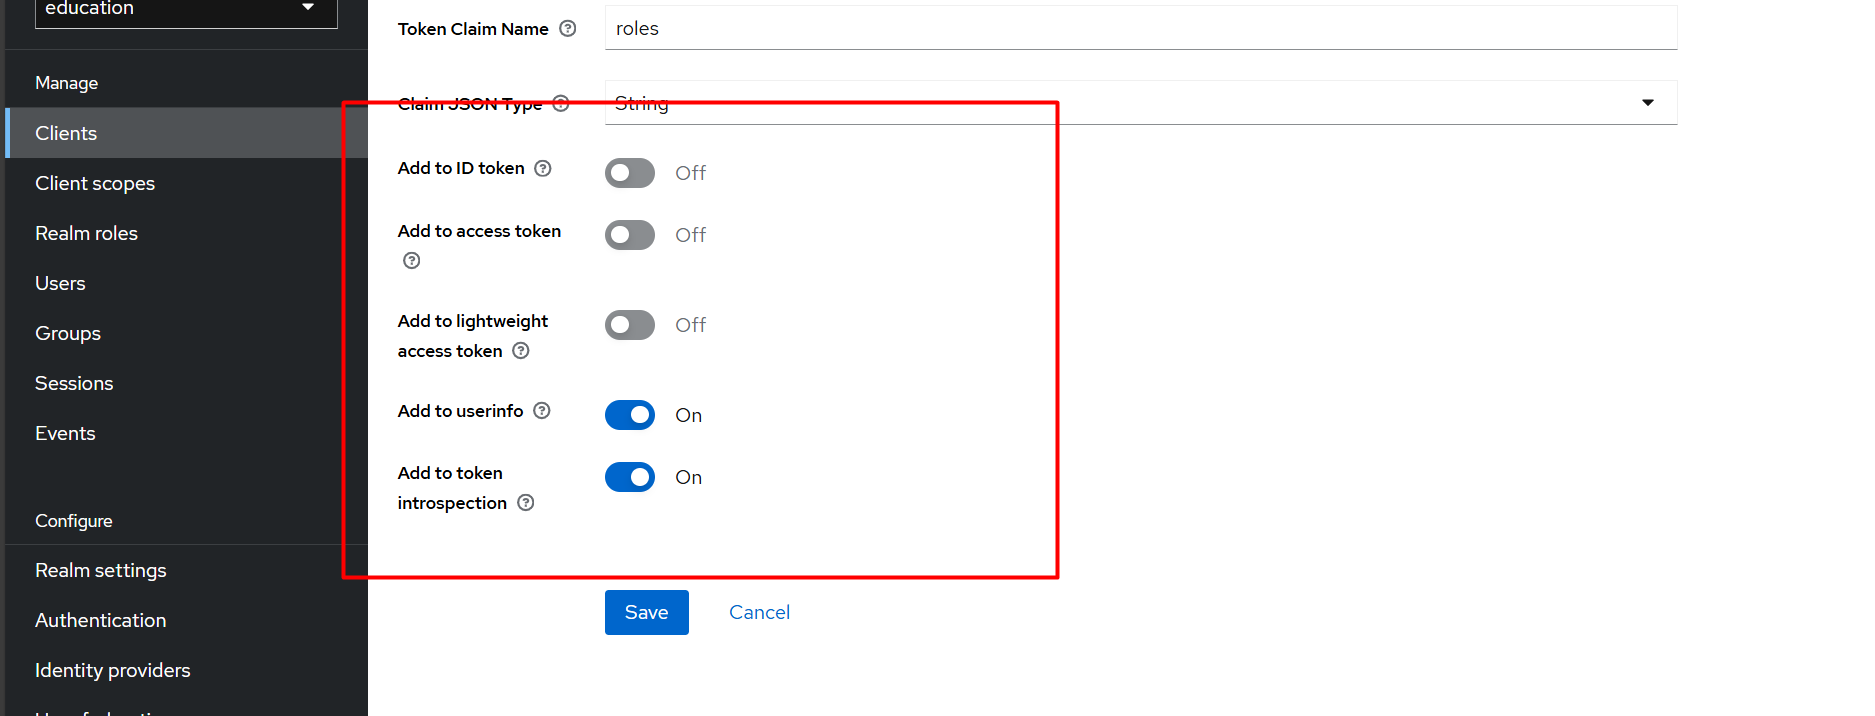
Figure 11: Set the mappers to display the client roles.
- Next, go to the Users page, select Add user, create the new users, and click Save as shown in Figure 12:
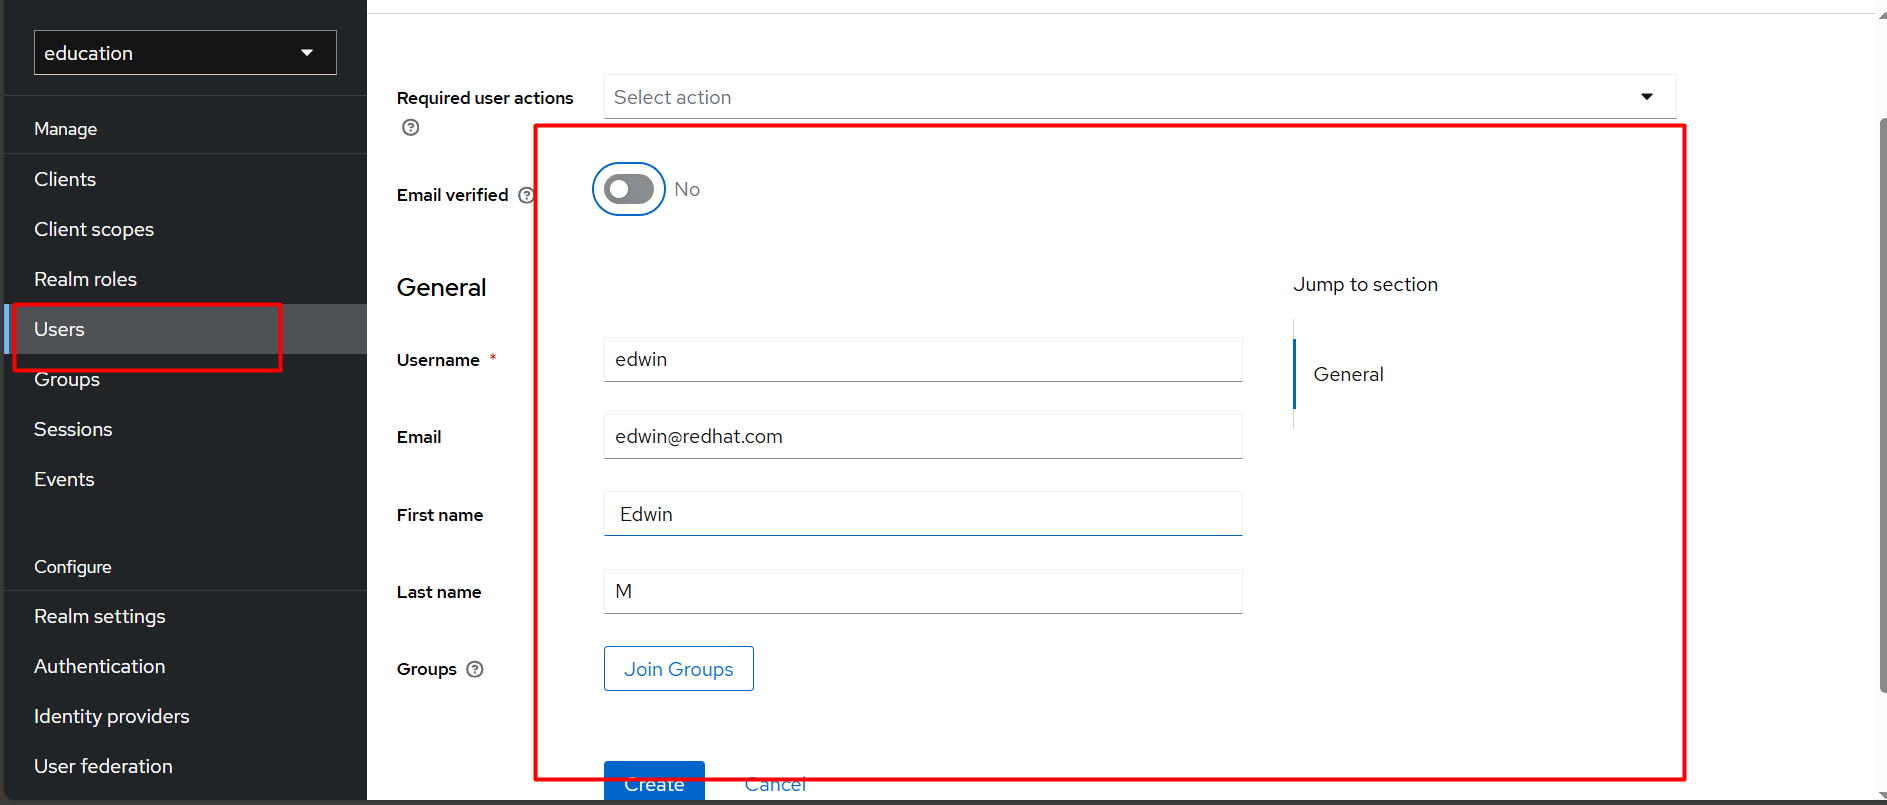
Figure 12: Create the new users
- And finally, in the Role Mappings tab, select the Client Roles for each user in jakarta-school, as shown in Figure 13. These should be create-student-grade, view-student-grade, and view-student-profile.
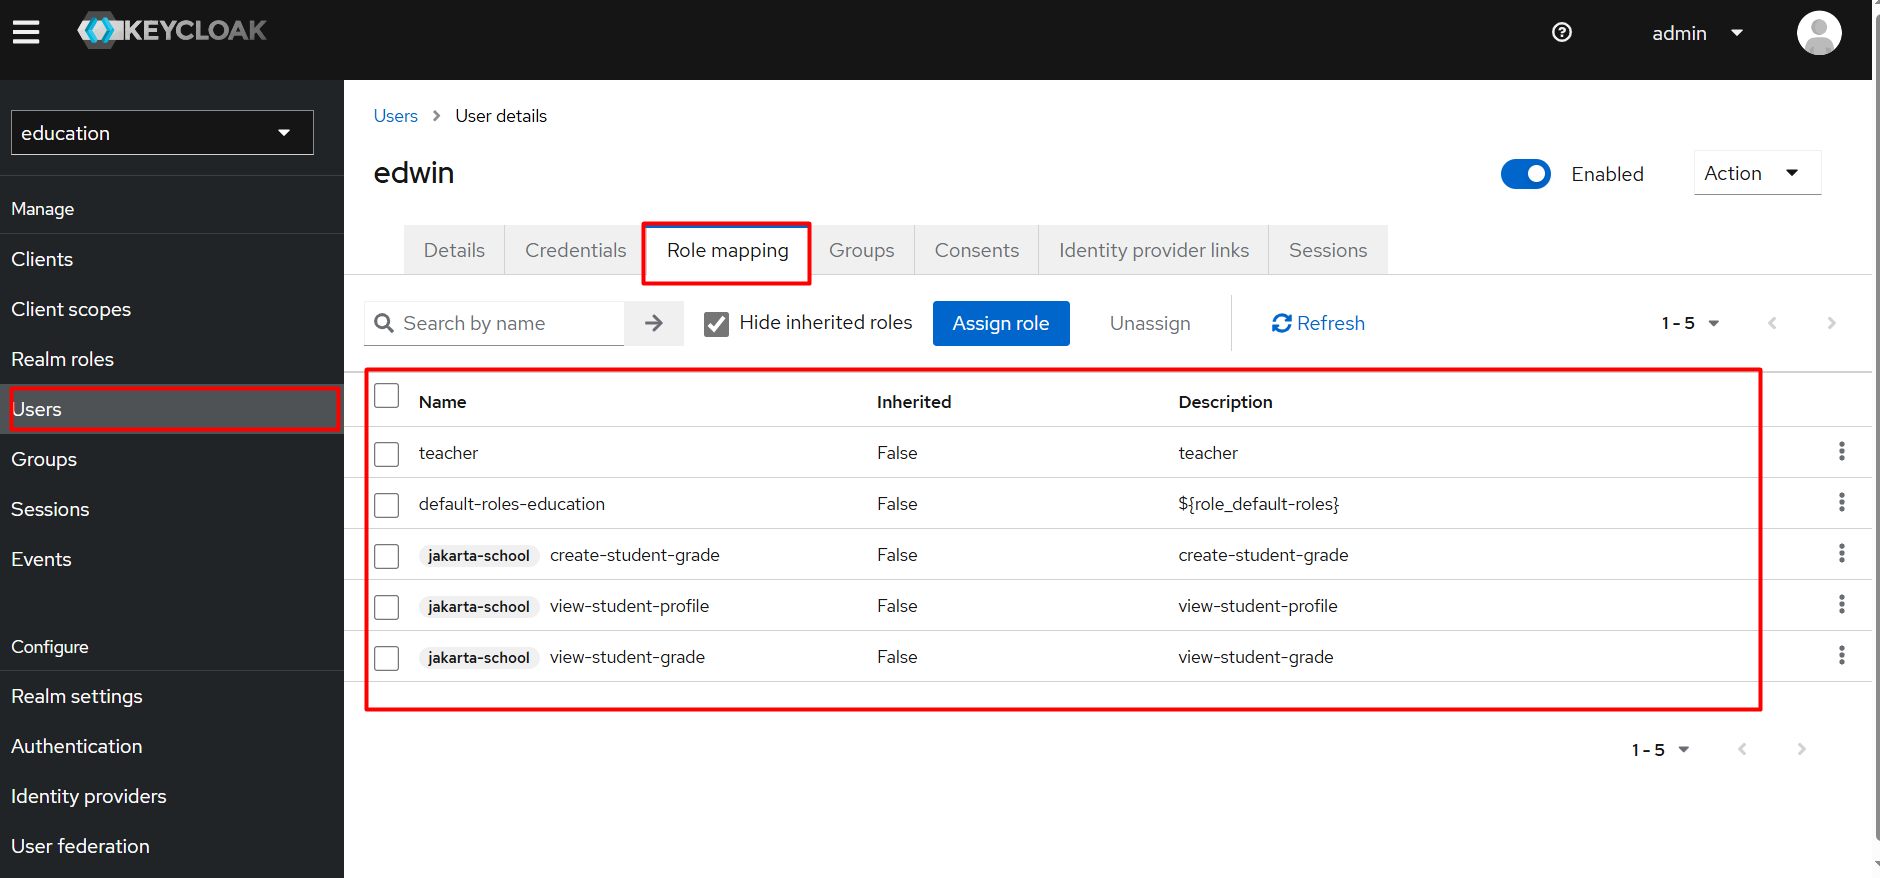
Figure 13: Select the Client Roles for each user in jakarta-school.
- This concludes my demo of the Keycloak configuration.